To those that are impacted by the deprecation of the Google Calendar V2 API, the following temp fix has been created to get back up and running if you are using the Google Calendar Events Plugin prior to version 2.x
PLEASE NOTE: We want to make certain that everyone understands that there is no warranty for this free software.
To Patch Version Prior to 2.0 ( i.e. have a gce-feed.php file ):
V3 requires a Google API Key. To get a key, you must have a Google Developer account ( this is free https://console.developers.google.com ). Tip: If specifying IPs when setting up your key, be sure to list all test environments ( thanks Donna ).
Open up the file and replace “<YOUR KEY HERE>” with the key you obtained from your Google Developer Console Make sure you remove the < > brackets as well.
Make a backup copy of the gce-feed.php file located in /wp-content/plugins/google-calendar-events/inc
Upload this new file.
To Patch Version 2.0 ( i.e. have a class-gce-feed.php file ):
I have removed this path. The developers have released a patch that is now better than the TEMP fix I had out there to bridge the gap. Please get the latest update from them.
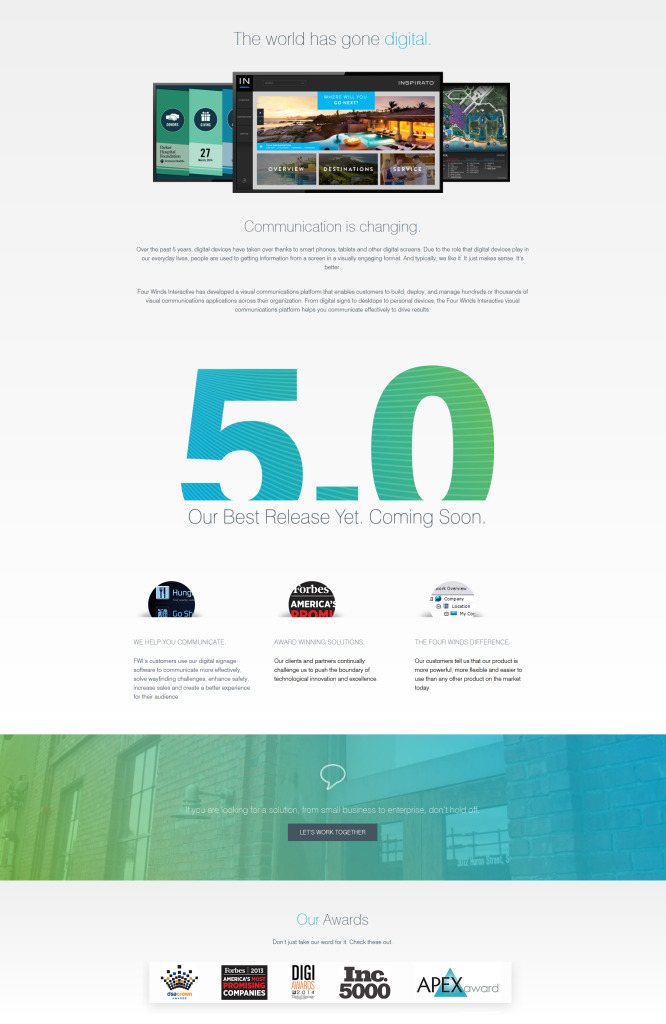
In the homestretch of a long project, Four Winds Interactive reached out to Wyolution to shore up and complete some development tasks required to go live. Faced with a long list of issues to address and a short time frame, we structured the effort to utilize not only Wyolution’s resources, but FWI’s as well. We provided designers direct access to the project to make changes on the fly while Wyolution focused on heavy lifting tasks. This collaborative approach drastically reduced turn around time without compromising our software development processes and standards.
The following instructions outline the steps required to setup an environment without having to use WAMP. There are many ways to setup an environment, but I have settled on the following steps. Leave a comment if you have questions or want to point out corrections.
Prerequisite Downloads
MySQL Community Server – For this article, I downloaded the most current version ( 5.6.19 ). There are two flavors, I stand alone and web based install. ( Download page: http://dev.mysql.com/downloads/windows/installer/5.6.html )
PHP – Again for best results, be sure to PHP downloads from PHP for Windows. The download I selected is the 32-bit Thread Safe version ( 5.5.14 ). Because the Apache server is going to be 32-bit, we need to stay consistent. We select the Thread Safe version because it comes with the Apache/PHP connector need to link Apache and PHP together. ( http://windows.php.net/downloads/releases/php-5.5.14-Win32-VC11-x86.zip )
Installation Steps
MySQL
The MySQL install is very straightforward since it has an MSI.
Run the installer.
During the Configuration utilize the default options ( Development Machine, Port 3306, Open Firewall ).
Provide a root password. You don’t have create additional users. You can do that from the command line later or via the MySQL Workbench ( additional software product http://dev.mysql.com/downloads/workbench/ ) that provides you with a GUI interface to MySQL.
Utilize the default service settings. ( MySQL56, start MySQL at startup, use system account). You can change this later via the Administration Tools -> Services and elect to manual start it if you want.
NOTE: If you need to make changes to the MySQL server settings, you do this by editing the my.ini file located in ( C:\ProgramData\MySQL\MySQL Server 5.6 ). Do not try to place this file in the Program Files directory.
Apache
The Apache process requires extracting files and updating the configuration file. Though we could walk through creating different configuration files, moving the root directory and creating vhost entries, this tutorial will keep all the configuration within the main configuration file and will not create any vhost entries.
Extract Apache to a location on your drive. I have elected to extract the files to c:\userapps\apache-2.4.9
The next few steps require editing the httpd.conf file located in <install dir>\Apache24\conf
Change all occurrences of “c:/Apache24” with <install dir>/Apache24 ( e.g. c:/userapps/apache-2.4.9/Apache24 ). NOTE the forward slash ‘/’, not a backslash ‘\’.
Because it is required by applications such as WordPress, uncomment the mod_rewrite.so module. ( about line 153 ). Do this by removing the # character at the beginning of the line.
To cut down on startup messages, change the ServerName value to ServerName www.mylocalmachine.com Make sure the # has been removed from the beginning of the line.
Now we need to create a service in windows. Launch a CMD prompt as an Administrator. Navigate to <install path>/Apache24/bin directory. Use the following command to create the Apache Service: httpd.exe -k install -n “Apache2.4” ( If you get an error saying MSVCR110.dll is missing, which was a problem on an older Windows 7 machine, then you need to download and install the MVC C++ 2012 Redistributable package update 4 ).
If you need to install the Redistribution packages, make sure you install both the x86 and x64. These are downloaded as two separate files.
Now start the service via Administration Tools -> Services or by entering the following in the CMD window: net start “Apache2.4“
Validate Apache is working by opening a browser and going to http://localhost and validating that you get the message “It Works!”
PHP
The PHP process requires extracting files and updating both the PHP and Apache configuration file.
Extract PHP to a location on your drive. I have elected to extract the files to C:\userapps\php-5.5.14
Edit the httpd.conf file that we edited above.
Add the following lines to the httpd.conf LoadModule php5_module “<intstall path>/php5apache2_4.dll” AddHandler application/x-httpd-php .php # configure the path to php.ini PHPIniDir “<intstall path>”
Example: LoadModule php5_module “C:/userapps/php-5.5.14/php5apache2_4.dll” AddHandler application/x-httpd-php .php # configure the path to php.ini PHPIniDir “C:/userapps/php-5.5.14”
Create a file called test.php in the Apache root directory ( <install path>/Apache24/htdocs ) with the following contents: <?php phpinfo(); ?>
Restart Apache ( you can use the Administration Tools -> Services panel to do this )
Load the test page using your browser and going to http://localhost/test.php Validate you get the “PHP Version 5.5.14” header and all the other PHP information about the server.
Now we are close but need to edit the php.ini file located in <install path> ( e.g. c:/userapps/php-5.5.14 ). We need to edit this file in order to load some common PHP extensions for accessing MySQL, creating graphics (GD2), fetching web resources ( CURL ), etc.
Copy php.ini-development to php.ini
Uncomment ;extension_dir = “ext” and provide a fully qualified path to the ext directory. When done it should look like: extension_dir = “<install path>/ext” Example: extension_dir = “c:/userapps/php-5.5.14/ext”
Uncomment the following extensions: extension=php_bz2.dll extension=php_curl.dll extension=php_fileinfo.dll extension=php_gd2.dll extension=php_mysql.dll extension=php_mysqli.dll extension=php_pdo_mysql.dll
Restart Apache ( you can use the Administration Tools -> Services panel to do this )
Load the test page using your browser and going to http://localhost/test.php Validate that the GD module and CURL module are both present in the test page output.
When one of the top school districts in Wyoming was ready for a website overhaul, they partnered with Wyolution and PB Communications for UX design, information architecture and development to ensure the new web presence would support students, parents and the public on a wide range of devices.
The project included a content management system that allows staff from the district as well as all 10 schools to update and deliver timely communications. Schools have their homepages with stories and calendars while the district and the main homepage can bubble up and display a story from any of the existing school stories.
As a consumer of Google services, the district utilizes calendars to track academic, sporting and district events across all schools. We were able to integrate these 50+ calendars into the site thus eliminating the need to build and delivery copies of all these calendars and support the districts initiative to only have to manage a single calendar for any one category of events.
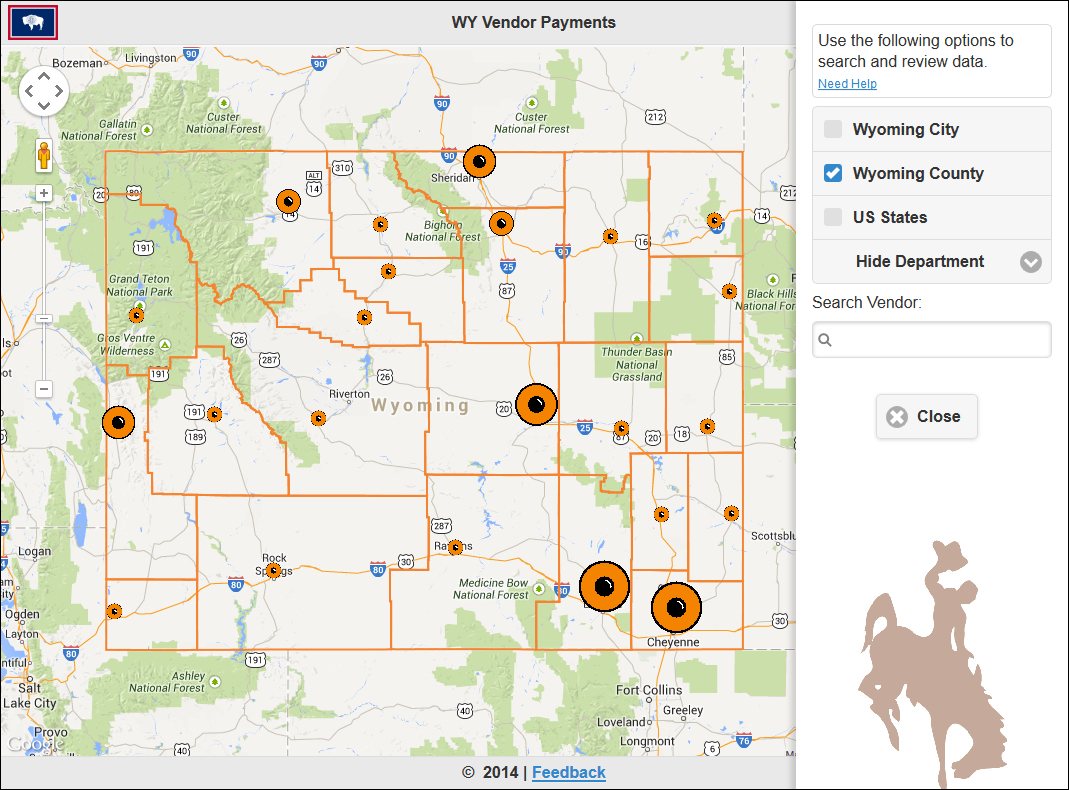
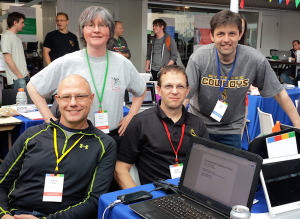
Wyolution partners Mark Thoney and Jared Kail joined Anne Gunn of the Sheridan Programmers Guild and Tighe Fagen of Gannett Peak Technical Services to form a 4-person team named “Code Rangers” to compete in Google’s first ever GovDev Challenge. The 24-hour hack-a-thon, held on May 17th and 18th, 2014, in Denver, Colorado, was a partnership between the states of Wyoming and Colorado, Google and MoDev. The goal of the event was to find creative technical solutions to problems faced by state government.
The three challenges of the competition were not known to participants prior to the event. Of the three issues presented, Code Rangers chose the only challenge put forth by the State of Wyoming: Government Budget Transparency. “Wyoming is more than a place where we live – it’s our passion,” remarked Jared Kail. “That’s why when Wyoming presented a problem it was facing, we knew we had to tackle it.”
At the end of the caffeine-fueled coding event, Code Rangers ended up taking 1st place honors in its challenge category. “It took us by surprise, really. We drove down to Denver to work together as a team, meet new programmers, learn a few new things, and maybe to help solve some problems at the state. We didn’t think that winning was in the cards for us,” commented Mark Thoney, of Wyolution.
Code Ranger’s final 24-hour project can be found at http://govdev.wyolution.com. The project was conceptualized to take the complex and large set of state vendor data, combine it with publicly available information, and present it in a way that is intuitive and easy to use. “Our goal was to create a solution that was easy to use and would pique visitors’ curiosity. If we did our jobs right, the data will generate more questions than it answers – questions that taxpayers should be asking of their state government,” Kail said.
The team encourages you to go out to the site, try it out, and leave feedback via the form at the bottom of the page.
Imagine being on top of the world – the Grand Teton at 13,775 ft., soaring over 6,530 ft above the ground below. Beneath you are huge vertical walls, granite rock slides, steep glaciers and thin mountain air. Above you is nothing but blue sky.
In a place like this you want your climbing guide to be aware of every possible condition. Exum Mountain Guides recently teamed with Wyolution to implement a new “guide’s only” section of their backend system that allows guides to communicate with one another conditions they experience in one of the World’s most extreme settings. This system includes the ability to post conditions; use threaded comments; and upload files so guides can share pictures of conditions and data sheets.
When safety is concern #1, there is no one in the world better than Exum Mountain Guides, and Wyolution is proud to play a small part in keeping their clients safe.
Exum Mountain Guides’ Programs page allows visitors to dynamically switch between different program types, and even switch from winter to summer programs, all without leaving the page.
Climbing, skiing and adventuring in the Grand Tetons of Wyoming are amazing experiences, and no one knows that better than Exum Mountain Guides. Recently Wyolution partnered with Wyoming, Inc. and Exum to develop a site befitting of Exum’s surroundings. The design features stunning photography from the many Exum guides, along with killer videos and updated content that focuses on the climbing experience.
Technically, Wyolution was able to create a “responsive” site that morphs well to tablet and mobile platforms, while still keeping the beautiful look and feel of the original site. Using jQuery’s isotope technology, the site features a very flexible page layout that promos Exum’s many programs in a unique and appealing way.
Because Search Engine Optimization (SEO) is so critical in today’s environment, Wyolution created an updated URL structure that is more SEO friendly for search engines, while maintaining past “linkology” so existing indexes and bookmarks didn’t break. After all, having a gorgeous site doesn’t do much good if no one can find you!
Most people climb the Grand Teton in the summer, when the snow has left the valley and temperatures on the peak are more…hospitable. Yet, there is a whole group of adventurers that see a 10′ blanket of snow as inviting as a field of wild flowers. For those people, Exum guides skiing, hosts winter mountaineering courses, and instructs ice climbing throughout the region. To help Exum cater to both seasons, Wyolution created a site that can morph
Exum on a Samsung Galaxy Tab Mobile Device
into whatever season the visitor desires. Using dynamic CSS and jQuery-drivin Javascript, everything from slider images to link colors change depending on whether the viewer prefers short sleeves or a down jacket. The site even adjusts content — the programs a visitor sees — depending on what they are interested in. When the goal is to convert a web visitor into a “flesh and blood” visitor, providing your audience with exactly what they want is crucial.
Wyoming, Inc. worked hand-in-hand with Exum and Wyolution as the marketing specialists — marrying design and professional content with the technology provided by our developers. With Exum’s incredible story and images; Wyoming, Inc’s ability to provide consumable information; and Wyolution’s technical skillset, we believe Exum ended up with a beautiful and flexibile site that will serve them, and their clients, well into the future.
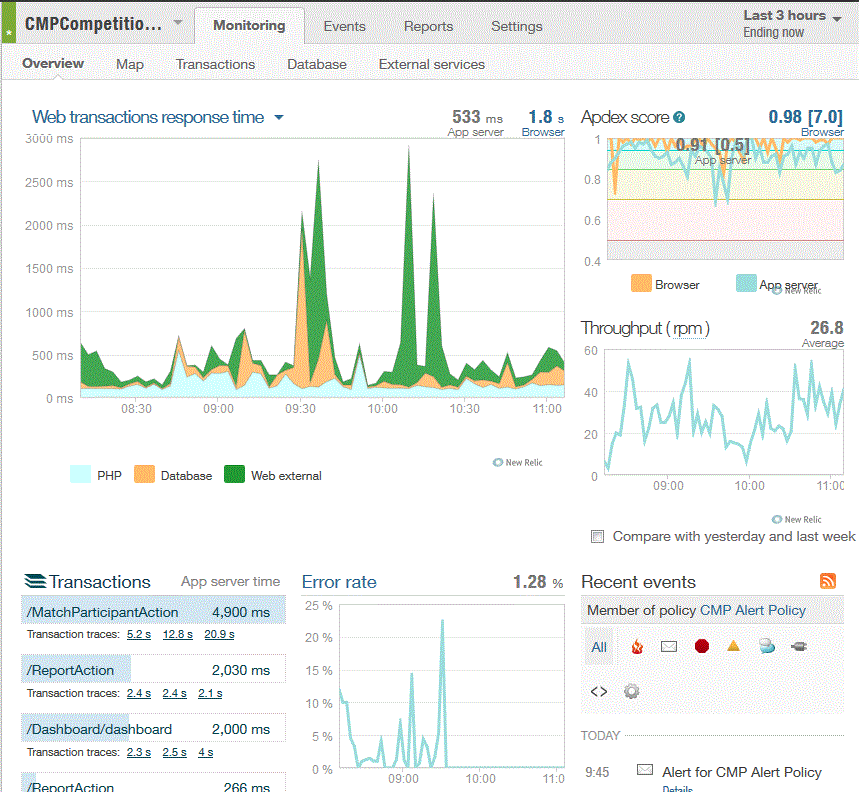
Performance can make or break an Internet Application. The trouble is, there are a lot of moving parts – from database queries on the backend to server performance, from slow network traffic to poorly designed javascript code. Trying to get a handle on how your application is performing has traditionally been a very difficult task.
Enter “New Relic“. This server-based performance-tracking suite of tools helps to monitor, measure and improve performance of applications and, if interpreted and utilized correctly, can save tremendous time in helping to enhance your application.
Wyolution recently integrated New Relic with multiple clients, including the Civilian Marksmanship Program’s Competition Tracker. We were able to immediately use the results to optimize queries that were slowing down the system; discover, troubleshoot and fix errors that were previously unknown to the team; and fine tune various parts of the stack to increase performance significantly. The result is a faster-running, more error-free environment for the CMP’s user base; a better product for the CMP that generates less support calls; and peace of mind at Wyolution that the app is running smoothly, performing well, and being monitored for trouble spots should they arise. That’s a win-win-win in our book.
When The Civilian Marksmanship Program (the CMP) holds shooting matches, it isn’t a group of guys plinking at targets out behind town. These are the premier shooting events held in the US, in which thousands of competitors – from military sharp shooters to amateur shooting enthusiasts – compete. Wyolution has worked hand in hand with the CMP to develop software that handles the logistics behind the competitor registration, match operations, and results tracking of all of their sanctioned events.
One area of recent improvement to the system dealt with match registrations. When you have 2,500 competitors showing up for a match, staffing resources to handle the registration and check-in is an event in itself. Prior to the fall of 2013, the CMP had to run reports and tailor the data with past experience to understand how the match was progressing. Wyolution turned to data visualization to help make this process more clear.
Now the CMP can tell at a glance how registrations are progressing; how many shooters have been verified as part of a match; how many entrants have cancelled; and the % of participants that have checked into the match. This “at a glance” view has helped the CMP plan for staffing as well as get a clearer picture on the historical trends surrounding the dynamics of match participation.
Several of the members at Wyolution have had a long relationship with Coach USA. We designed, implemented and maintained my aspects of their collection of web sites and applications. From eCommerce solutions that address sight seeing trips to scheduled services that move people on a daily basis, we have played an active role to ensure these applications continue to meet the needs and goals of CoachUSA.
Their schedule services operates many useful bus routes in North America. Their safe, reliable, and convenient scheduled services will get you downtown, to the office, to the airport, home from college, or wherever you need to go. Services are offered across 34 states with hundreds of stops spread across many cities. The system was designed to allow day-to-day maintenance of schedule changes to be managed by Coach USA through existing workflows. No intervention on our part is required.
Currently our focus is providing 24/7 support. Whether we are called upon to fix a bug or address a security concern or add a feature, we are there for Coach USA.
CoachUSA
Coach USA owns over 20 local companies in North America that operate scheduled bus routes, motorcoach tours, charters, and city sightseeing tours. We cover three geographic areas: the North East and North Central regions of the United States, and Canada. These local companies are each independently managed and operated to meet the specific needs of their local communities.


 Wyolution partners Mark Thoney and Jared Kail joined Anne Gunn of the
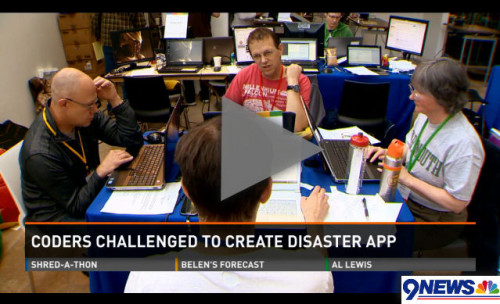

 Imagine being on top of the world – the
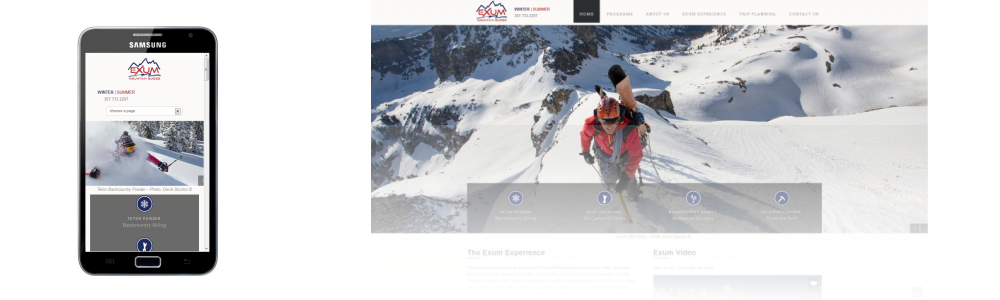


 Performance can make or break an Internet Application. The trouble is, there are a lot of moving parts – from database queries on the backend to server performance, from slow network traffic to poorly designed javascript code. Trying to get a handle on how your application is performing has traditionally been a very difficult task.
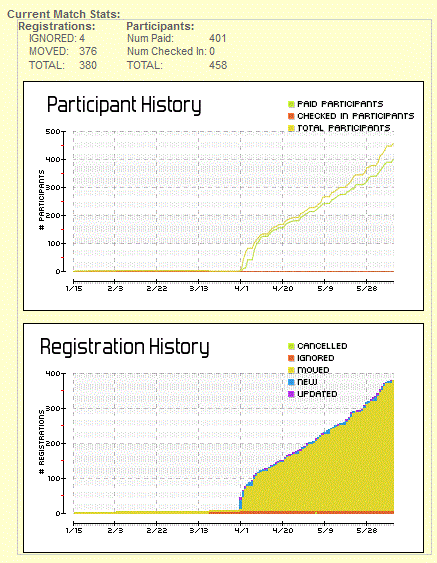
 When
When 
 Several of the members at Wyolution have had a long relationship with Coach USA. We designed, implemented and maintained my aspects of their collection of web sites and applications. From eCommerce solutions that address sight seeing trips to scheduled services that move people on a daily basis, we have played an active role to ensure these applications continue to meet the needs and goals of CoachUSA.